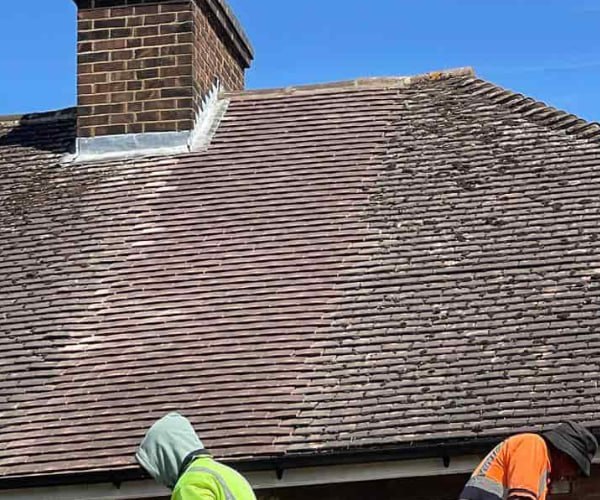
What Are the Signs of Failed Lead Flashing?
Lead flashing is an important part of many roofing systems because it helps prevent water from entering vulnerable junctions. It is commonly used where different roof surfaces or building elements meet, creating a weather-resistant detail around areas that would otherwise be difficult to protect using roof tiles or slates alone.
When flashing begins to deteriorate, the first warning sign is not always a dramatic leak. Small changes in the lead, surrounding mortar or adjoining roof covering can allow moisture to penetrate gradually. By the time damp becomes visible inside the property, the original defect may have been present for some time.
For homeowners in South Elmsall, West Yorkshire, recognising the early signs of failed lead flashing can help ensure that the affected area is assessed before continued water penetration causes deterioration to surrounding roofing materials.
How Can You Tell When Lead Flashing Is Failing?
Failed lead flashing can reveal itself through visible movement, cracking, lifting, gaps or deterioration around its fixing points. Internally, damp patches and recurring water ingress around roof junctions can also indicate that flashing is no longer performing effectively.
However, the source should always be properly investigated. Water can travel beneath roof coverings before becoming visible indoors, which means a damp patch near a chimney or wall does not automatically prove that the flashing is responsible.
Professional roof inspection helps establish whether the lead itself has failed or whether another nearby roofing component is allowing water to enter.
Lead Flashing That Has Lifted Away From the Roof
One of the clearest warning signs is lead that no longer sits correctly against the adjoining roof surface.
Flashing needs to form an effective detail around the junction it is protecting. If part of the lead lifts, curls or moves away from the surface, an opening can develop where wind-driven rain may penetrate.
The amount of movement may initially be quite small.
Even so, a change in the position of the flashing deserves attention because repeated weather exposure can potentially enlarge the affected area.
Gaps Around the Edges of the Flashing
Visible gaps are another indication that a flashing detail should be inspected.
These may develop where the lead meets brickwork, tiles, slates or another roof surface. The surrounding materials can also deteriorate, leaving the flashing itself apparently intact but no longer properly integrated with the junction.
From ground level, these gaps can be difficult to identify.
Closer professional inspection can establish whether the detail remains secure and whether the surrounding materials are still providing the support and weather resistance intended.
Cracks or Splits in the Lead
Lead is valued in roofing because it can accommodate a degree of movement, but repeated expansion and contraction can eventually contribute to fatigue where the detailing is unsuitable or the material has deteriorated.
Cracks and splits create direct weaknesses in the flashing.
Some can be obvious, while smaller fractures may only become noticeable during closer inspection.
Once a split develops, simply pressing the lead back into position will not restore the integrity of the material. The extent and cause of the damage need to be assessed before deciding on an appropriate repair.
Lead That Has Become Distorted or Buckled
Flashing should follow the shape required by the roof detail without excessive distortion.
If sections become noticeably buckled, rippled or displaced, this can indicate movement within the material or problems with the way it has been secured.
Distortion does not always mean that water is already entering the property.
However, significant movement can create vulnerable points and should be investigated before the flashing becomes more extensively displaced.
Flashing Pulling Away From Brickwork
Where lead flashing is incorporated into masonry, the connection with the brickwork is particularly important.
If the flashing begins pulling away, an opening can form along the junction. Deterioration of the surrounding pointing can contribute to this problem.
The visible lead may still appear to be in reasonable condition while the detail securing it has weakened.
For this reason, assessment should include both the flashing and the materials immediately surrounding it.
Deteriorated Mortar Around Lead Flashing
Sometimes the lead itself is not the first component to deteriorate.
Mortar around flashing details can crack, loosen or break away. Once this happens, the lead may become less secure and water can potentially find a route into the junction.
Replacing loose mortar without examining the complete flashing detail may not always resolve the problem.
The condition and positioning of the lead should also be checked to establish whether movement has already occurred.
Recurring Damp Near a Chimney
Chimneys create several junctions where the roof covering meets vertical masonry, making correct flashing particularly important.
If damp repeatedly appears around the internal area associated with a chimney, defective flashing may be one possible cause.
However, chimney-related water ingress can originate from several different points.
The flashing, surrounding roof covering and chimney structure should therefore be considered together rather than assuming that any damp near a chimney must originate from the lead.
Damp Where a Roof Meets a Wall
Another area where lead flashing is commonly used is the junction between a pitched roof and an adjoining wall.
If the flashing in this area becomes loose, cracked or poorly seated, water may enter at the junction.
Internally, this can sometimes appear as damp near the corresponding wall or ceiling.
Again, the location of the visible moisture provides useful information but does not necessarily identify the precise entry point. Water can travel before it becomes apparent indoors.
Water Marks That Appear After Wind-Driven Rain
Some flashing defects only become noticeable under particular weather conditions.
A small opening may resist ordinary vertical rainfall but allow water to enter when rain is driven against the roof by strong winds.
This can create leaks that appear intermittent.
If damp develops only during certain weather conditions, that pattern can provide useful information during professional diagnosis. It may indicate that a junction or overlapping detail is vulnerable when water approaches from a particular direction.
Staining on Ceilings or Walls
Brown or discoloured patches on internal ceilings and walls are common signs that moisture has entered somewhere within the building envelope.
Where these marks are close to a roof junction protected by lead flashing, the flashing should be considered as part of the investigation.
The important point is not to assume that the stain sits directly beneath the defect.
Water can follow roofing underlays, timbers and other surfaces before reaching the point where it becomes visible.
A proper roof inspection should therefore trace the likely route of moisture rather than repairing the area directly above the internal stain without further investigation.
Peeling or Damaged Internal Finishes
Persistent moisture can eventually affect decorative finishes.
Paint may begin to peel, surfaces can discolour and plaster may show signs of dampness.
These symptoms indicate that moisture needs to be investigated, but they do not explain how it entered.
Repairing the internal finish without dealing with the roofing defect will not address the cause. The external roof covering and relevant junctions need to be assessed first.
Previous Flashing Repairs That Keep Failing
Recurring problems around the same roof junction deserve particular attention.
If flashing has previously been patched, resealed or adjusted but water continues returning, the earlier work may not have addressed the original cause.
There may be deterioration within a larger section, movement around the flashing or another nearby defect contributing to the problem.
Repeatedly treating the same visible point can become ineffective when the actual entry route has not been identified.
A broader assessment can determine whether a more appropriate repair is required.
Temporary Patching Can Hide Deterioration
Older flashing sometimes shows evidence of repeated surface treatments.
Sealants or patching materials may have been applied to visible cracks or edges in an attempt to stop water ingress. While the area may look covered, this does not necessarily mean the original flashing detail has been restored.
Temporary materials can also make later inspection more difficult by obscuring the condition of the lead underneath.
Where previous patching is visible and moisture problems have returned, the complete detail should be assessed rather than simply adding another layer of material.
Surrounding Roof Tiles or Slates Should Also Be Checked
Lead flashing works alongside the rest of the roof covering.
A slipped tile, damaged slate or defect immediately beside the flashing can produce symptoms that resemble flashing failure.
This is why diagnosis should extend beyond the lead itself.
The surrounding roof covering, junctions and supporting details can provide important evidence about where water is actually entering.
A targeted inspection helps avoid replacing sound flashing when the true problem is located nearby.
Flashing Problems Can Develop Gradually
Lead flashing does not necessarily move from sound condition to complete failure suddenly.
Small changes can develop over time. A minor gap can gradually become larger, mortar can deteriorate around a fixing point, or a small split can extend through repeated movement.
During this stage, the roof may not produce obvious internal symptoms.
Early inspection can therefore be useful when visible changes are noticed externally, even if there is not yet a significant leak inside the property.
Why Lead Flashing Is Important Around Roof Junctions
The main tiled or slated areas of a roof are designed to shed rainfall through overlapping courses.
Junctions are more complicated because different surfaces meet one another. Without appropriate detailing, these intersections can provide natural routes for water.
Lead flashing helps bridge and protect these vulnerable areas.
When it fails, water can potentially bypass the main roof covering without any tile or slate being obviously missing.
This is why flashing defects should be treated as part of the overall roofing system rather than as minor cosmetic imperfections.
Can Failed Lead Flashing Be Repaired?
The appropriate solution depends on the condition of the existing material and the reason it has failed.
Some localised defects may be suitable for targeted repair. More extensively split, distorted or incorrectly detailed flashing may require more substantial remedial work.
The surrounding roof condition also matters.
A repair should restore the complete junction rather than concentrating only on making the lead look tidy from the outside.
Professional assessment allows the extent of the defect to be established before deciding what work is actually necessary.
Why Finding the Cause Matters Before Repairing the Flashing
A successful flashing repair begins with diagnosis.
If lead has moved because of a problem with its fixing or installation, simply pressing it back into position may provide only a temporary improvement. Likewise, repeatedly sealing a crack without understanding why the material is splitting can allow the problem to return.
The surrounding construction should be considered alongside the visible defect.
This root-cause approach helps ensure that repair work is directed towards the reason for the failure rather than only its most obvious symptom.
Signs That Lead Flashing Should Be Inspected
It can be worth arranging a professional roof inspection if you notice:
- Lead lifting or curling away from the roof
- Visible gaps around flashing edges
- Cracks or splits in the lead
- Buckled or distorted sections
- Flashing pulling away from masonry
- Crumbling or loose material around flashing joints
- Damp near a chimney or roof-to-wall junction
- Recurring internal staining after rainfall
- Previous flashing repairs that repeatedly fail
- Visible patching around an area where water ingress continues
None of these signs should automatically be used to diagnose the complete problem from ground level. They are indicators that the relevant roof area deserves closer assessment.
Early Attention Can Keep Repairs More Focused
A small flashing defect may initially affect only a limited section of the roof.
If water continues entering over a prolonged period, surrounding materials can remain exposed to moisture unnecessarily.
Investigating the problem early provides an opportunity to establish what has failed while the issue may still be relatively localised.
This does not mean every visible imperfection requires extensive work. The purpose of assessment is to distinguish minor defects from problems that need repair.
Why Professional Roof Inspection Makes a Difference
Lead flashing can be difficult to assess properly from ground level, particularly around chimneys and elevated roof junctions.
Professional inspection allows the condition of the lead and surrounding materials to be examined more closely. The objective is to establish whether the flashing has genuinely failed, identify the likely reason and determine whether connected roofing defects are present.
This avoids relying solely on the location of an internal damp patch or the most obvious external symptom.
A carefully diagnosed repair can then focus on restoring the affected junction without unnecessary work elsewhere.
Lead Flashing Repairs in South Elmsall, West Yorkshire
At WS Roofing South Elmsall, we assess lead flashing problems as part of the wider roof system rather than automatically assuming that the most visible defect is the complete cause.
Where water ingress or deteriorated flashing is present, the lead, adjoining roof covering and relevant junctions can be examined to determine where the weakness has developed.
For homeowners in South Elmsall, West Yorkshire, this approach helps ensure that repair work is based on the actual condition of the roof and directed towards restoring the affected area appropriately.
Conclusion
The main signs of failed lead flashing include lifting edges, visible gaps, cracks, splits, distortion, deterioration around masonry joints and recurring damp near roof junctions. Internal staining or peeling finishes can also indicate water ingress, although the exact entry point should always be properly investigated.
Because lead flashing works alongside tiles, slates, masonry and other roofing components, a visible problem in one area does not necessarily mean the lead is solely responsible. Professional assessment can identify the actual source and determine whether a local repair or more substantial remedial work is appropriate.
If you have noticed damaged lead flashing, recurring damp or signs of water ingress at your property in South Elmsall, West Yorkshire, contact WS Roofing South Elmsall to arrange a professional roof assessment. We can identify the source of the problem and recommend an appropriate repair to restore the affected roof detail.
Call us on: 01977 804 687
Click here to find out more about WS Roofing South Elmsall
Click here to complete our contact form and see how we can help with your roofing needs.